


Microscope install and power on/off
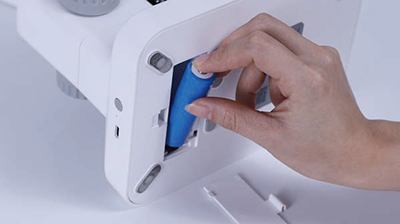
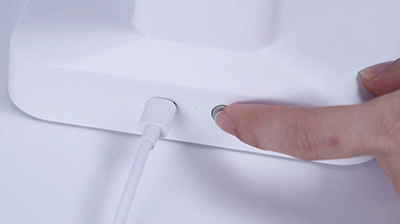
Open the bottom cover, fix 18650 battery inside.
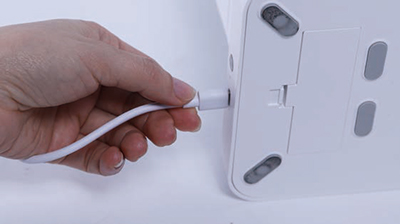
Every time when you fix new battery, users must insert the power cable for 1-2 seconds to activate the microscope

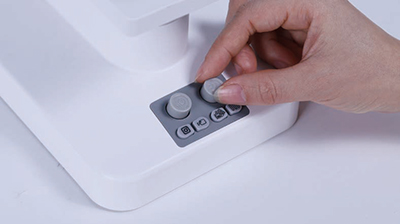
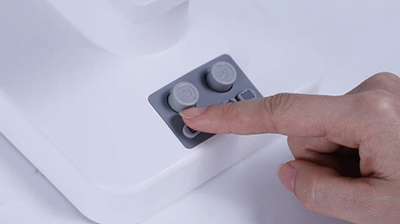
Press the power button for short time then the signal light is on
Long press the power button for 2-3 seconds to shut off the power supply.
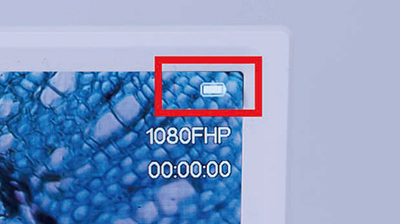
Charging: normal condition when battery with charging.
Microscope application
Press the power button for short time then the signal light is on
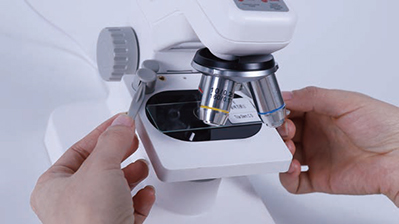
Fix the slide with the stage clip, making sure sample slide in the center of the microscope
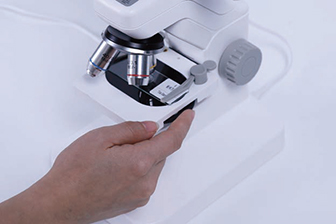
Adjust the diaphragm on the side of the microscope to change the diaphragm aperture

Turn the nosepiece to the center of the microscope from low magnification, adjust focus knob until you see the clear slide image.
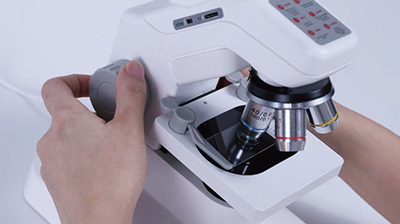
Press the button to switch the transmitting to reflecting light. Turn the knob to change the light intensity
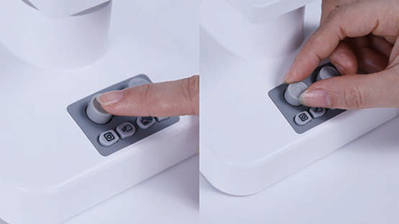
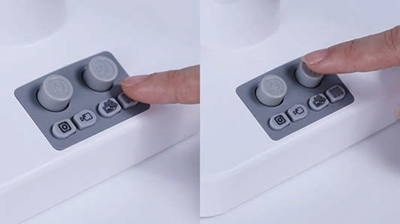
Press WIFI button one time, LCD will show how to carry on, press one more time to quit
Turn the wifi button to zoom in and out the digital zooming
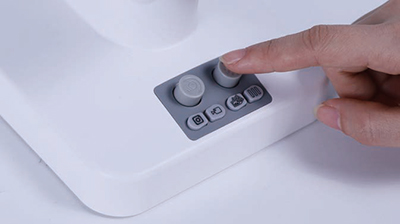
Press photography button one time, users get into picturing model, press one more time to take pictures
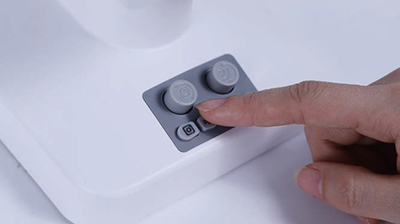
Press recording button one time, users get into recording model, press one more time to record (red light blinks when recording), press once again to stop.
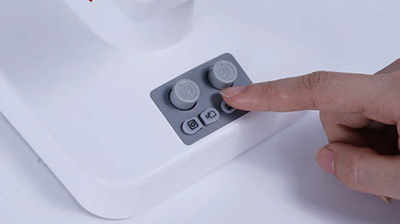
Press album button to get into picture album for pictures or videos users have taken. Turn the wifi button to choose the picture you want to review, press again to zoom. Press one more time to quit.
Press menu button, users can get into first level page, turn wifi button to set the microscope specification and language, press wifi button one more time to confirm, then press menu button to quit.
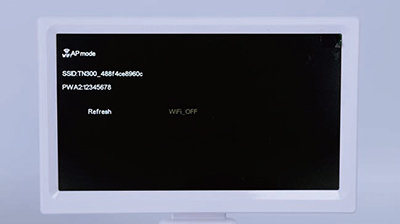
Long press on WIFI(2 seconds) button to get into wifi model, at the same time microscope will send out wifi signals and shows ID address with code (MT_488XXXXXXXX)
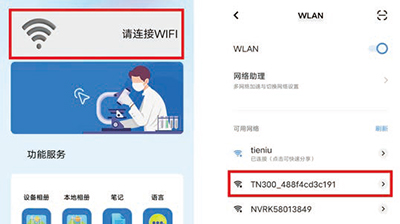
Open the APP on your mobile and choose the wifi names shows on the microscope LCD screen and connect with it, then your APP will show wait for observation
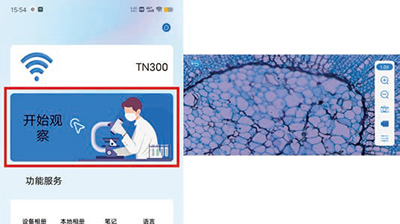
After successfully connected with your mobile. Users can take pictures, recording, digital zoom in and out with mobile and adjust the sample picture colors.

Physical button on microscope can also control the APP like take pictures, recording, color adjustment and ect.
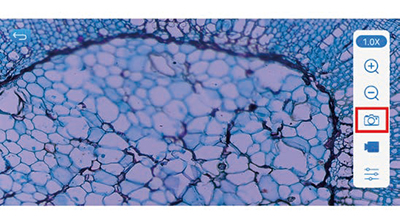
When users take pictures by APP, microscope inner card will also save same image and videos.
How to connect to computers
Install the StrangeView software offered by MIC TECH on your computer.
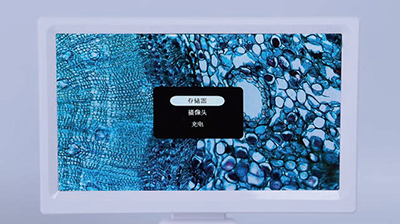
Connect TYPEC interface to the microscope, another port with USB port to computer, then on the LCD screen there shows three options(card, camera or charging), turn the wifi knob to choose the second one (camera), then press wifi knob to continue
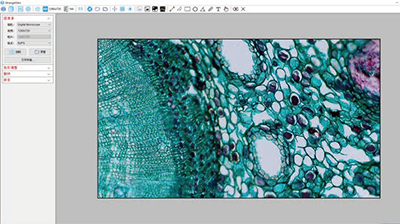
View images with your computer, open the StrangeView software and then you can see images from the microscope
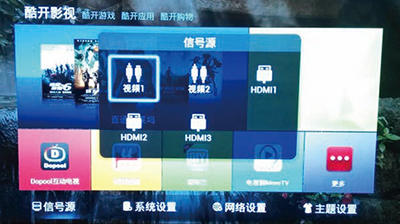
Video cable HDMI port to microscope, another port to TV, then choose the related TV port signal, users can view samples from TV.
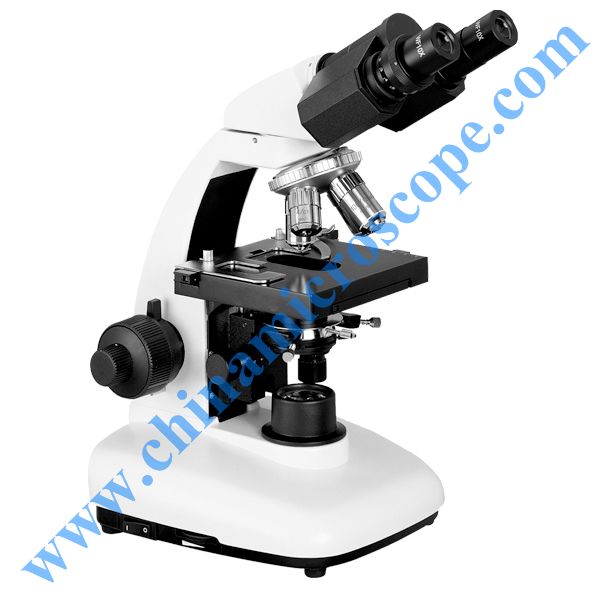
MIC-TN300 serials digital student’s microscope
| Name | MIC-TN300 serials digital student’s microscope |
| Model | MIC-TN300 |
| Color | Customized |
| Sensor | Optical format 1/2.9” |
| Pixel size 2.8um*2.8um | |
| Sensor resolution 1920(H)*1080(V) | |
| Pixel | 2MP |
| Objectives | 185 serials achromatic 4X, 10X,40X
195 serials optional |
| LCD screen | 7 inches IPS screen |
| Screen resolution | 1024*600 |


评价
目前还没有评价